 Genius Asian
How to Unclog a Bathroom Sink: Check the Stopper Before the Trap
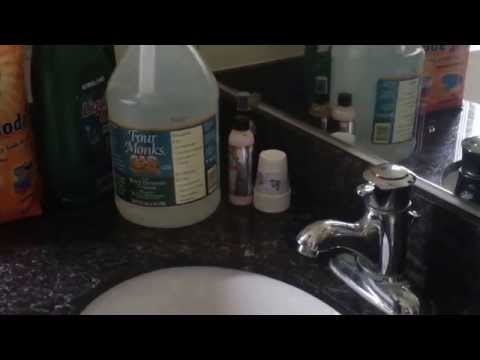
A slow bathroom sink is a good reason to inspect the stopper before taking pipes apart. Hair caught around that mechanism can be easy to reach once you identify how the stopper attaches. Begin with a visual check, clean the accessible parts, and test the drain before moving farther down the pipe.
Genius Asian’s bathroom sink video is above. The checklist below helps you choose the next step for the stopper and pipe arrangement under your own sink.
First check: is the problem limited to this sink?
| What you see | Your next step |
|---|---|
| One sink drains slowly; other fixtures work normally | Inspect the stopper and accessible drain opening |
| Stopper barely rises when you move the lift rod | Check the linkage before assuming the pipe is blocked |
| Water leaks into the cabinet | Stop running the faucet and locate the leak |
| Several fixtures back up, or sewage comes into a fixture | Stop using the affected fixtures and arrange plumbing help |
| Chemical drain cleaner is already in standing water | Stop mechanical work; follow the product’s instructions and tell the plumber what was added |
Clear the cabinet before starting. Put a towel and a shallow bucket below the drain, and photograph the assembled pipes. The photo makes it easier to return washers, clips and rods to their original positions.
What to gather
- Gloves and eye protection.
- A bucket, towels and a flashlight.
- A small brush and a disposable container for debris.
- The drain manufacturer’s instructions, if available.
- An appropriate hand tool only if the instructions call for one.
Keep removed hardware together. A missing retaining clip or reversed washer can turn a successful cleaning into a leak. Put hair and sludge in the trash instead of washing them into another drain.
Identify the stopper before pulling it
A lift-rod stopper usually connects to a horizontal rod behind the drain below the sink. On some designs that rod retains the stopper, so pulling harder from above will not release it. Kohler’s pop-up drain instructions show the ball rod, retaining nut and linkage involved.
Look for these parts with the faucet off. If your assembly matches the manufacturer’s diagram, place the bucket below it, release the linkage as directed, loosen the retaining nut and withdraw the rod enough to free the stopper. Remember the rod’s orientation before moving it.
A push-button or click-style drain can have a different removal procedure. Find its model instructions rather than applying lift-rod steps to it. If parts are corroded, glued, cracked or inaccessible, stop before forcing them.
Clean the stopper and visible drain opening
Lift out the released stopper and remove the hair wrapped around it. Brush away accessible residue and inspect the part for damage. Use a flashlight to look into the drain; retrieve visible debris without pushing it farther down.
Keep the cleaning focused on material you can reach. Do not add household chemicals to an unknown product already in the pipe. A blocked drain containing cleaner requires a different approach because opening it can expose your skin and eyes to the liquid.
Reinstall the stopper using the manufacturer’s sequence. Reconnect the rod and clip, then check that the stopper travels freely. Delta’s stopper-removal guidance is another useful reference for assemblies held by a horizontal rod.
Test the simple fix before opening the trap
Run a small amount of water and watch both the bowl and the connections below. If it drains normally, increase the flow and check again. A dry paper towel held against a joint makes a small leak easier to see than a quick glance at a dark cabinet.
Close the stopper, put a little water in the bowl, then open it. Confirm that the stopper opens enough for water to pass. An incorrectly adjusted linkage can make a clean drain behave like a partially blocked one.
If the bowl still fills quickly, turn off the faucet before it overflows. Record whether cleaning changed the flow at all; that is useful information if a plumber needs to continue the work.
When a removable P-trap is the next step
The curved pipe beneath the sink holds water and may also collect debris. On a serviceable slip-joint assembly, a bucket belongs underneath before any connection is loosened. Remove standing water from the bowl first, and check that no drain cleaner is present.
Use the installation instructions for your trap. Photograph the washer positions and support the adjacent pipe while releasing a joint. Empty the removed trap into the bucket, clear accessible material and inspect the washers and pipe walls. Replace damaged components with compatible parts.
Glued pipe, badly corroded metal and concealed connections call for a different repair. Stop if a pipe moves at the wall or a fitting starts to deform. Once a removable trap is reassembled, repeat the small-flow and full-bowl drainage checks while watching every disturbed joint.
A short maintenance and follow-up checklist
Check the stopper whenever drainage begins to slow. Remove visible hair before it builds into a larger tangle, and keep small items away from the open drain during cleaning. Choose a hair catcher that fits your drain and still allows water through freely.
After any repair, check the cabinet again after the next few uses. If the sink repeatedly slows despite a clean stopper and trap, have the downstream drain and venting assessed. Repeatedly dismantling clean parts will not solve a blockage farther along the system.
For another fixture, see our kitchen sink guide. Keep the diagnosis tied to the fixture: a kitchen waste line and a bathroom pop-up stopper can collect different material.